Classic Turtle decision guide
Mahjong Turtle Strategy Guide
Compare legal pairs by the access they change: which cover disappears, which horizontal side opens, which positions become free, and which legal pairs remain afterward.
The overview below combines the project's five-layer Turtle coordinates, free-tile checks, one tested seed transition, and Learn Mode captures into a practical order for comparing available moves.
What makes Turtle geometry distinctive
The classic board has 144 positions across five layers. Its base forms a broad body with a projecting head at the far left and two tail positions at the far right. Above the body sit successively smaller 6-by-6, 4-by-4, and 2-by-2 blocks, capped by one centered tile.
That shape creates two different access problems at once. Same-layer rows generally open from their ends, while overlapping upper positions keep lower tiles covered regardless of side access. A strong move may solve one or both constraints.
Move-priority table
Use this order as a comparison tool when more than one legal pair is available. The visible faces and current blockers still decide the move.
| Priority | Use when | Why it matters mechanically |
|---|---|---|
| Exposed upper layers | A matching pair includes tiles that overlap lower positions. | Removing upper blockers can make covered tiles pass the free-tile test on the next state. |
| Projecting head, tail, or row-end releases | A pair uses exposed ends whose removal opens the next same-layer position. | A row tile becomes free when it is uncovered and no longer has neighbors on both horizontal sides. |
| Pairs that open multiple tiles | Learn Mode or inspection shows one removal changes several cover or side relationships. | One pair can remove two independent blockers, producing more newly free positions than a neutral edge match. |
| Pairs that preserve matching options | Three or four accessible copies of a standard face create more than one possible pairing. | Choosing the pairing that keeps another useful copy available can prevent a dependent region from losing its only match. |
| Low-value removals that open nothing | No higher-access or row-release pair is available, or the removal preserves a necessary option. | The pair is legal and reduces the count, but it does not change which other positions are free. |
Seed 20260614: one pair unlocks five positions
initial    35 free | 16 pairs
remove     29 (24,4,0)
           143 (13,7,4)
unlocks    28, 139, 140,
           141, 142
after 38 free | 19 pairsIDs 29 and 143 are free matching 6 of characters tiles in the initial state. Removing cap ID 143 uncovers layer-three IDs 139 through 142, while removing east row-end ID 29 opens neighboring base ID 28. Subtracting the two selected tiles and adding five newly free positions changes the free count from 35 to 38; the legal-pair count changes from 16 to 19.
This makes pair 29–143 the largest immediate release among the three tested openings on this fixed board. It is a concrete first-step comparison, not a complete solution plan.
Learn Mode evidence from the playable board
These existing captures show the exact feedback used to evaluate blockers and successful removals. Each caption identifies the decision the image supports.
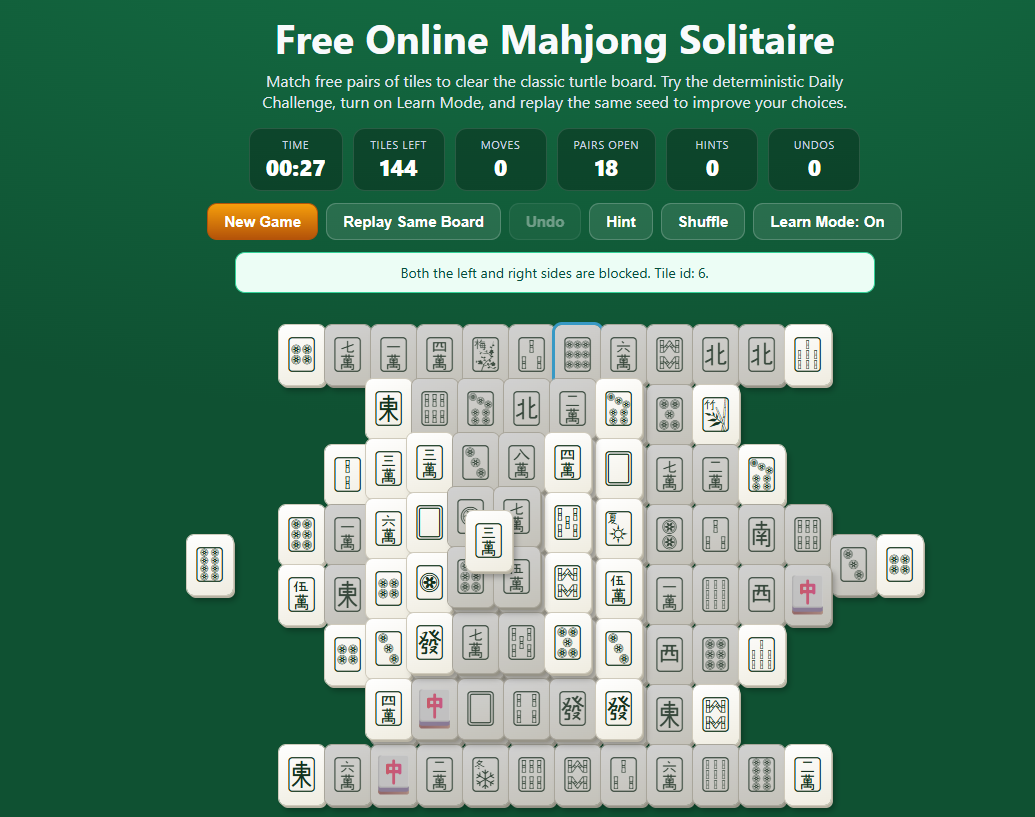
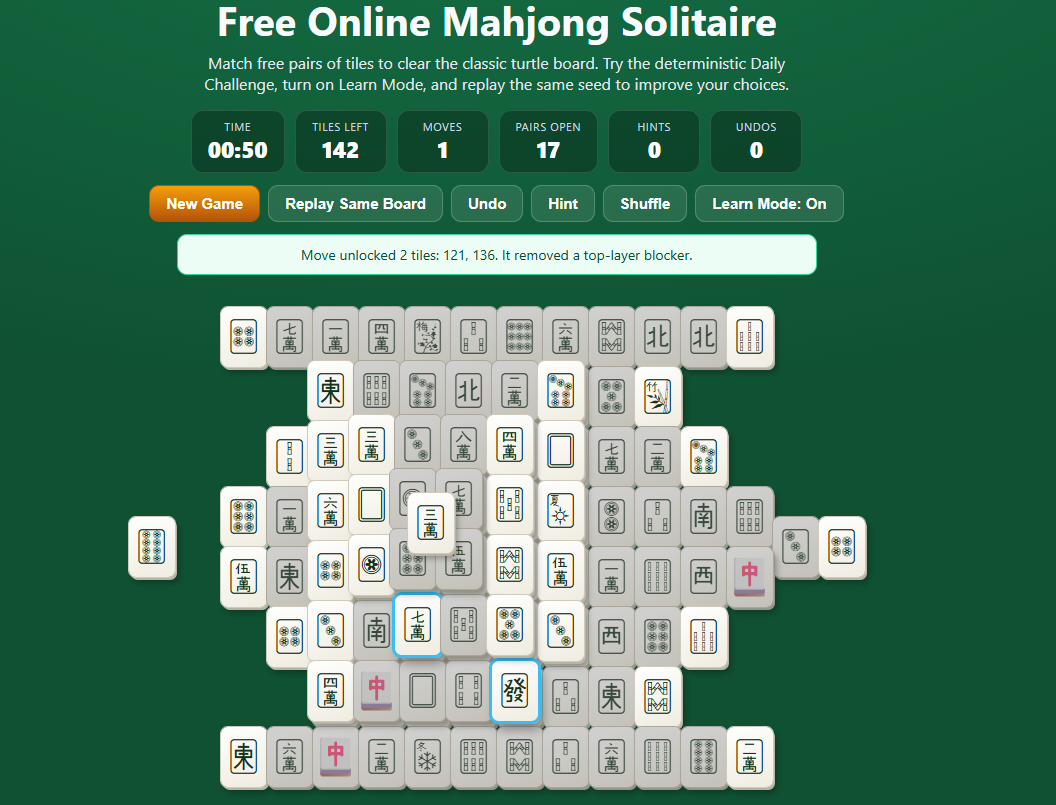
Compare releases before choosing
Start with legal pairs involving the cap, raised tiles, projecting ends, and long-row ends. For each candidate, compare the cover removed, sides opened, newly free positions, and resulting Pairs open count instead of relying on tile height alone.
When three or four accessible copies of one standard face create multiple pairings, compare which pairing removes a blocker and which useful copy remains free. Preserve a copy only when the resulting board state gives a reason to do so.
Analyze a dead end
When the legal-pair count reaches zero, distinguish faces blocked by geometry from free faces that lack a match. Use Undo until the history returns to a state with an actual alternative pair. Replay Same Board compares branches from the same initial assignment; Shuffle reassigns the remaining faces, so it tests a different state.
Practice with replay and Learn Mode
Replay the same board and compare candidate openings from the untouched state. Record the free-tile and legal-pair counts after each move; use Learn Mode to identify blockers and newly opened positions. Hint supplies one current legal pair, but the access change still has to be evaluated after removal.